


IC 0111
2023-05-10
Fast Lane - Create a new print channel
Congratulations! You successfully installed AutoPrint, and you already have started the application.
Accompanied by this chapter you will create and activate your first functional print channel. For the most use cases there is only one or a few simple steps left until AutoPrint can start its operation. More detailed information is attached further down in this online manual.
Initially, if AutoPrint has been started for the first time after installation, AutoPrint opens the setup window and offers to auto-create a first print channel. A1
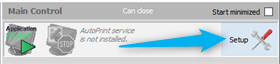
If you come back here later for creating or modification of a print channel, just open the Setup screen from the
AutoPrint main window.
Then follow the path B1 B2 B3 B4
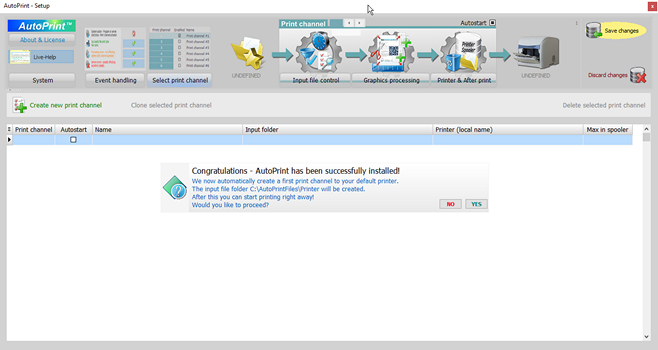

YES If you agree,a fully functional print channel is created and activated.
It will connect a new input file folder C:\AutoPrintFiles\Printer to your existing Windows default printer.
That’s it. You may now close the setup window and feed the input folder.
Nevertheless, it is recommended checking the just opened Graphics processing default settings, if these match with your preferences.
NO If you disagree and decide to
create one or more print channels
by yourself, just follow the next
steps from B1.


Auto-create the first print channel
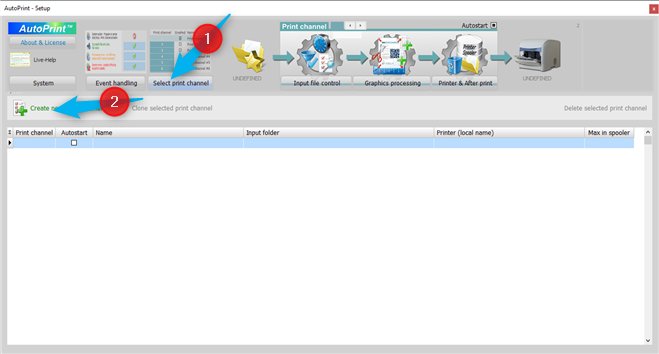

Create a new print channel
If not yet opened, enter the Select print channel tab.
Now click Create new print channel.
The just created new print channel is now ready to be completed with all necessary parameters.


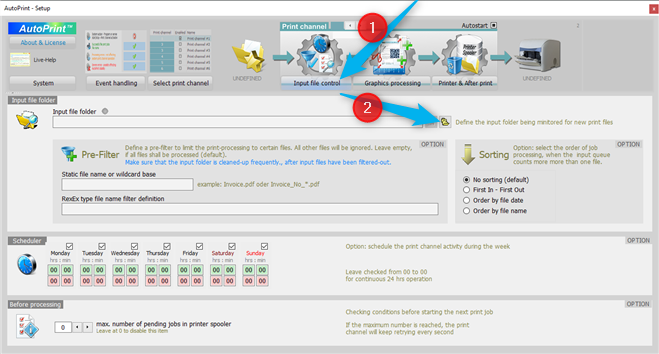

Create or define an input file folder
Click to open the Input file control tab.
Here open the file folder dialogue and select or create an input file folder for the current print channel.
All other parameters on this tab are set to default values, which match with the common use-cases.
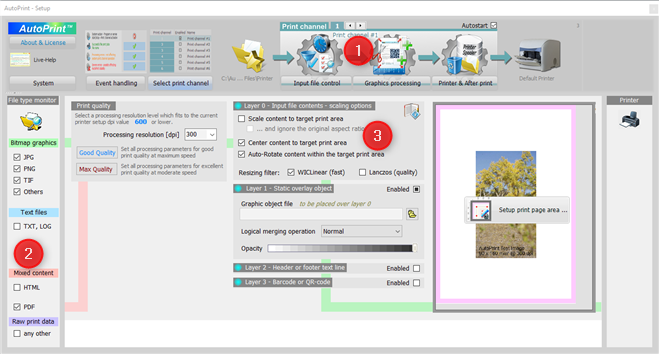

Adjust the graphics process settings
Click to open the Graphics processing tab.
Check and eventually change the selected
print channel number.
Select or deselect the input file types, which shall be processed by the print channel.
Adjust the page scaling parameters,
if needed. The default setup will print the file contents to the page center and not-scaled for maximum speed.
Details on scaling can be found here.

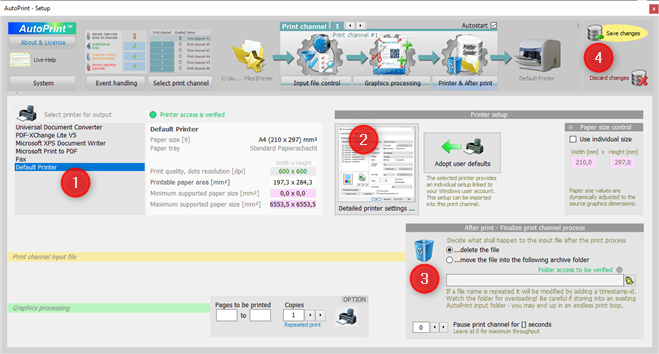

Adjust printer and final steps
Select the printer first.
The printer settings are the logged-in users preferences for the selected printer.
If needed, you can modify these settings for each print channel.
Per default the processed input files are deleted after printing. Alternatively you can let AutoPrint move these files to any folder.
Finally just save the individual setup and close the window. The print channel will immediately adopt the new parameters.

ONLINE MANUAL
Introduction